Beginners Car Care: How To Change Your Coolant
Author: Josh Date Posted:25 June 2023

Welcome to the sixth instalment of our Beginners Car Care guides. Today, we'll cover one of your vehicle's most crucial yet simple maintenance tasks: how to change the coolant. Maintaining your engine's temperature is vital for its performance and longevity. This is where coolant comes in. Commonly known as antifreeze, coolant prevents the engine from overheating and offers protection against freezing in colder temperatures.
This article will take you through the steps to replace your vehicle's coolant, helping you save money and keep your engine running smoothly.
What You’ll Need for a Coolant Change
Before changing your vehicle’s coolant, make sure you have the following:
-
New coolant - Refer to your vehicle's manual to determine the specific coolant colour recommended by the manufacturer. You can also check Nulon’s Lube Guide.
-
Drain Pan- This container will collect the old coolant.
-
Funnel- Used to pour the new coolant into the radiator.
-
Safety gloves and goggles - To help protect yourself from any potential splashes or spills.
How to Change a Car Coolant
Step 1: Prepare the vehicle
To ensure your safety and the effectiveness of the coolant change, park your vehicle on a flat surface and engage the parking brake first. Give the engine some time to cool down completely since working with hot coolant can cause severe burns. Afterwards, put on your safety gloves and goggles and you’re all set
Step 2: Locate the radiator and coolant reservoir
Open the hood of your vehicle and familiarise yourself with the radiator and coolant reservoir. The radiator is usually located near the front of the engine while the coolant reservoir can be found near the radiator or firewall. If you are unsure about their locations, consult your vehicle's manual.
Step 3: Drain the old coolant
Place the coolant catch pan beneath the radiator drain plug. With a socket set or wrench, loosen the drain plug until coolant flows into the catch pan. Allow the old coolant to drain completely.
Step 4: Flush the coolant system (Optional)
If you want to perform a more thorough coolant change, consider flushing the system. Flushing helps remove any residual contaminants or debris. Follow the specific instructions in your vehicle's manual to perform a flush, if desired.
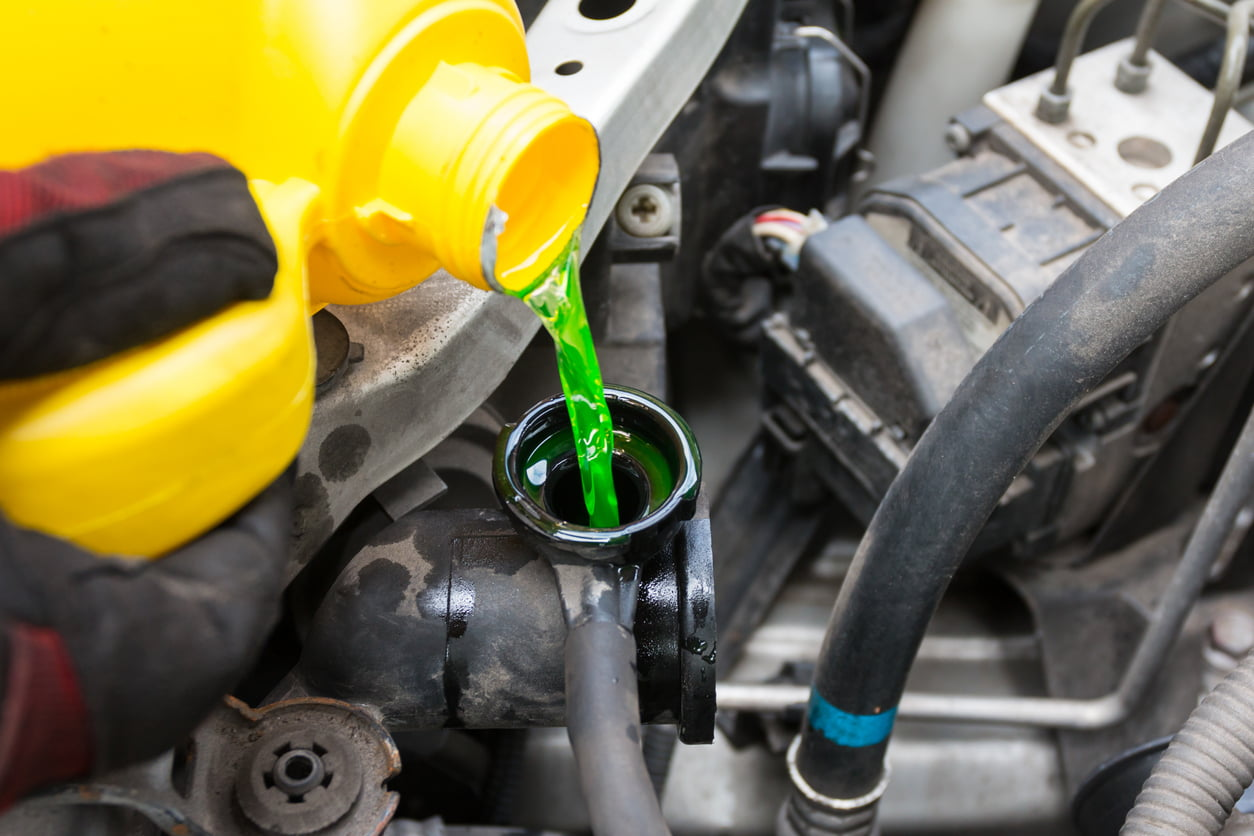
Step 5: Refill the vehicle with new coolan
Replace the radiator drain plug and tighten it securely. Locate the coolant reservoir and remove its cap. Place a funnel in the reservoir opening and slowly pour the new coolant into it until the level reaches the "Max" or "Full" mark on the reservoir.
Step 6: Check for any air bubbles
After refilling the coolant, start the engine and let it run for a few minutes. This will help circulate the new coolant and remove any air bubbles. Keep an eye on the coolant level in the reservoir and add more if necessary.
Once satisfied with the coolant level, securely replace the coolant reservoir cap, ensuring it’s tightly closed. Should there be any spills or splashes, safely wipe them off
Step 7: Properly dispose of the old coolant
Dispose of the old coolant responsibly by taking it to a recycling centre or an authorised waste disposal facility. Never pour coolant down the drain as it is toxic and harmful to the environment.
What You’ll Need for a Coolant Change
Regularly changing your vehicle's coolant is a simple maintenance task that helps keep your engine cool and running efficiently. By following this guide on how to change your coolant, you can confidently replace it yourself, ensuring your vehicle's longevity and optimal performance.
Remember to consult your vehicle's manual for any specific instructions or recommendations, and always prioritise safety throughout the process. For expert advice on all things automotive, feel free to contact any of our specialists at 1300 791 058 — Superspares is your go-to auto parts online store for trusted automotive solutions.

