Beginners Car Care - Engine Air Filter Swap
Author: Josh Date Posted:16 February 2023

Welcome to the second installment of our Beginners Car Care guides, where we break down simple auto maintenance jobs so you’re able to DIY install with our products and save yourself hundreds of dollars from a trip to your mechanic. Not everyone grew up with a grease monkey family member, there are no stupid questions here. Today we’ll be covering another one of the easiest and important services you can do on your vehicle, changing your Air Filter.
Changing the air filter in your vehicle is an essential part of regular maintenance. The air filter helps to keep the engine running smoothly by preventing dirt, debris, and other contaminants from entering the engine. Over time, the air filter can become clogged with debris and will need to be replaced. In this guide, we will provide step-by-step instructions to help you change your air filter, even if you have no prior experience.
.png)
Step 1: Determine the type of air filter you need
Before you start the process of changing your air filter, you need to determine the type of air filter you need. This information can typically be found in your owner’s manual or by checking the Ryco Catalogue to locate which part number is suitable for your vehicle. There are two main types of air filters: panel filters and cylindrical filters. Panel filters are typically rectangular and fit into a slot on the side of the engine. Cylindrical filters are round and typically located in a box near the engine.
Step 2: Gather the necessary tools and supplies
Once you have determined the type of air filter you need, you will need to gather the necessary tools and supplies. These include a screwdriver, a wrench, and of course an air filter. We strongly recommend servicing your vehicle with Ryco, you can view our range of air filters here.
Step 3: Locate the air filter housing
The air filter housing is typically located on the top of the engine and may be secured by clips, screws, or clamps. Use a screwdriver or wrench to remove any fasteners and open the housing.

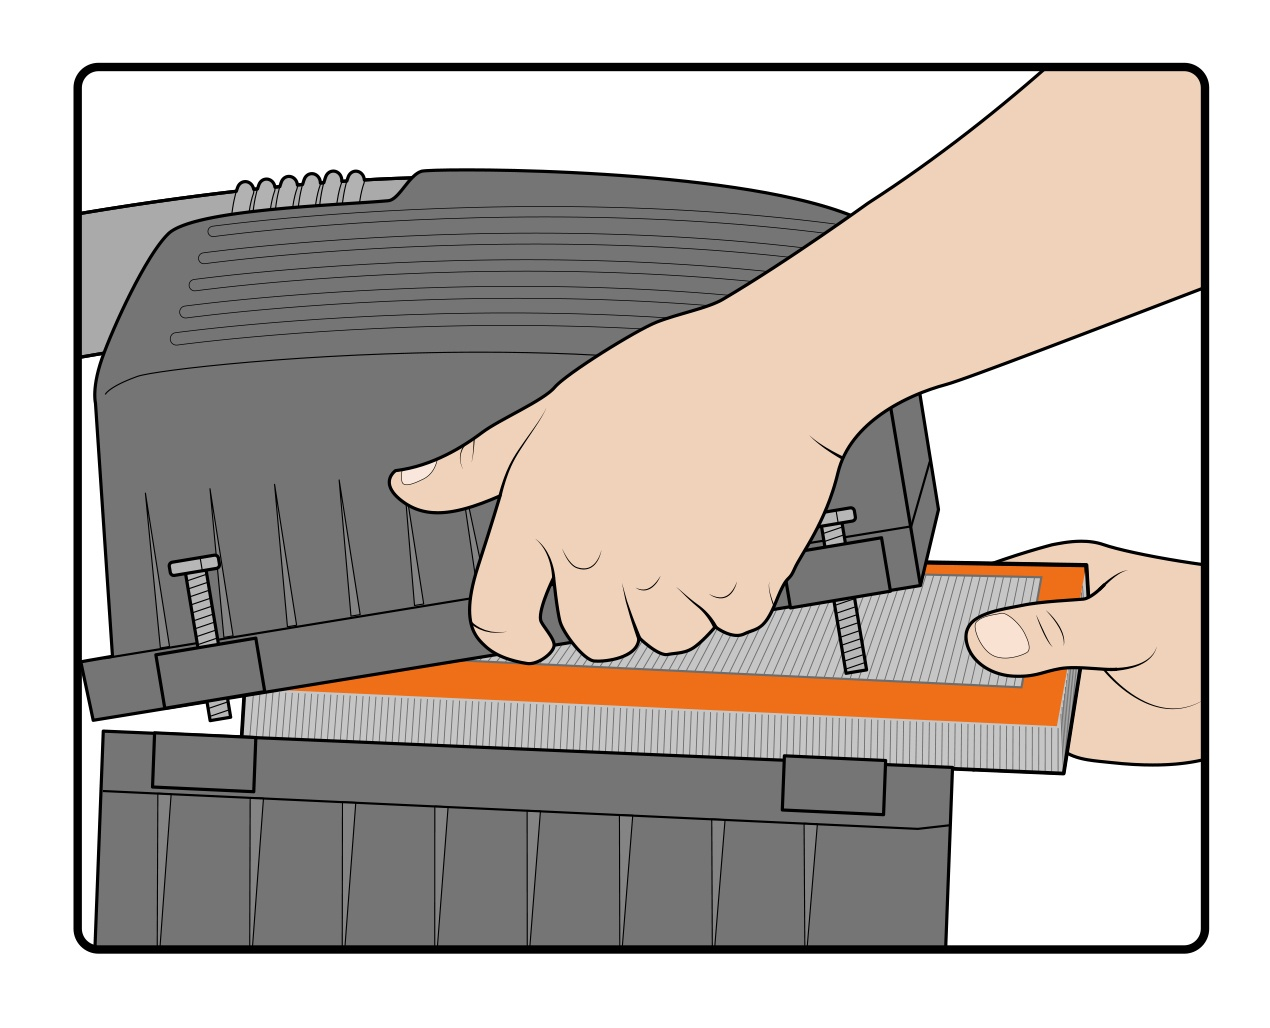
Step 4: Remove the old air filter
Once the housing is open, you can remove the old air filter. It should slide out easily, but if it is stuck, you may need to gently wiggle it to loosen it from its position.
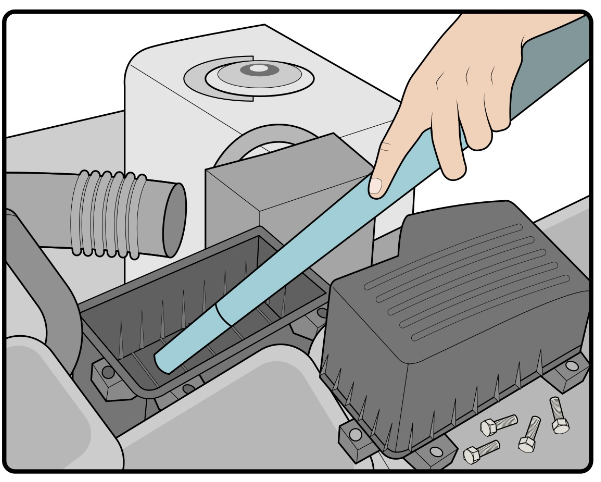
Step 5: Clean the Air Filter Housing
Before installing the new air filter, it is a good idea to clean the air filter housing. Use a clean rag or even a vacuum cleaner to wipe away any debris or dirt that has collected in the housing.
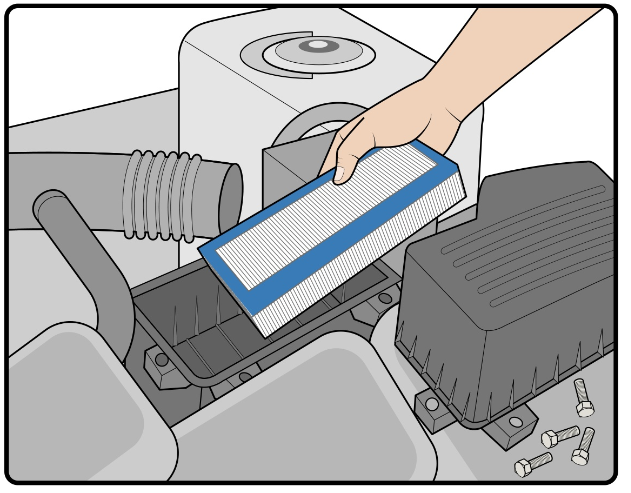
Step 6: Reconnect the Air Filter Housing
Take the new air filter and slide it into place. Ensure that it is securely seated in the housing and that it is facing the correct direction. Some air filters may have an arrow indicating the direction of airflow.
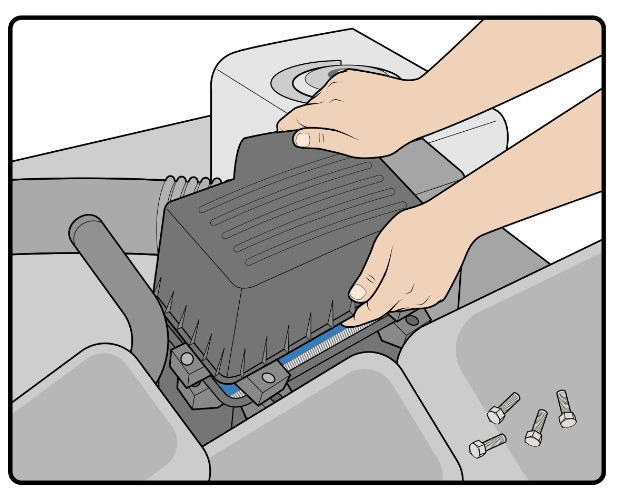
Step 7: Reassemble the Air Filter Housing
Once the new air filter is in place, you can reassemble the air filter housing. Replace any clips, screws, or clamps that you removed and ensure that the housing is securely fastened.
Step 8: Check the Air Filter Regularly
After replacing the air filter, it is important to check it regularly to ensure that it is still functioning properly. A dirty air filter can reduce engine performance and fuel efficiency, so it is important to check it at least once a year or every 15,000-20,000kms.

Congratulations, you have successfully changed your air filter! If you encounter any problems or have questions, don't hesitate to consult your vehicle owner's manual or a professional mechanic.
If you have any further questions, you can always speak to one of our experts for advice on 02 8711 9711